
- Introduction to SureContact Dashboard
- How to Install and Connect the SureContact WordPress Plugin
- What Do Contact Fields Mean in the SureContact WordPress Plugin
- How to Invite Members to a Workspace in SureContact
- How to Switch Organizations in SureContact
- Workspace-Level Contact Allocation in SureContact
- Workspace-Level Timezone Settings in SureContact
- How to Add a Custom Tracking Domain in a Workspace in SureContact
- SureContact MCP Server
- Creating Forms in SureContact
- Setup SMTP in SureContact
- Email Campaigns in SureContact
- How to Add a Preferences URL in Your Emails
- How to Share Email Templates in SureContact
- Spintax Feature in SureContact
- Deleting Sent Campaigns in SureContact
- A/B Testing Integration Guide
- Unsubscription Guide
- SureContact SMTP Setup Guide
- SMTP Routing User Flow
- Gradual Send Feature Guide
- Reusable Email Templates Guide
- Conditional Blocks Guide
- Scheduling vs. Sending Immediately Emails in SureContact
- Campaign Analytics Guide
- Email Tracking Opens Clicks SureContact
- SureContact Email Template Library Guide
- Sending Domains Subdomain vs Root Domain Guide
- DMARC Setup Guide
- Warming Up a New Sending Domain
- Email Link Actions in SureContact
- How to Add an Unsubscribe Link in Your Emails
- Analyzing a Campaign with AI (Spam & Ethics Check)
- FluentCRM Integration with SureContact
- SureContact Third-Party Integration — Step-by-Step Guide
- Fluent Forms Integration with SureContact
- SureForms Integration with SureContact
- WPForms Integration with SureContact
- Bulk Sync WordPress Users to SureContact
- Contact Form 7 Integration with SureContact
- Sync WooCommerce Customers with SureContact
- FluentCart & FluentCommunity Integration With SureContact
Email Link Actions in SureContact
Email Link Actions lets you attach a tag, list, sequence, or workflow to any link inside a Drag & Drop email; the action runs automatically the moment a contact clicks that link. This guide walks through the complete user flow: building a campaign, attaching a Link Action to a button, sending the email, and confirming the action ran from the Automations history.
Prerequisites
Before setting up a Link Action, please ensure the following:
1. An Email Campaign in Draft
Create or open a Standard email campaign from Campaigns → Email Campaigns. Link Actions are configured while composing the email, so the campaign must be using the Drag & Drop editor.
2. A Verified Sending Domain (SMTP)
A Send From (SMTP) address must already be configured under Campaigns → SMTP, since the Subject step requires a sender before you can continue to Compose.
3. At Least One Tag, List, or Workflow to Attach
Link Actions can add a tag, add the contact to a list, enroll them in a sequence, or trigger a workflow. Have the tag or list ready beforehand, or create a new one inline while configuring the action.
How to Set Up a Link Action
Follow these steps to attach an automatic action to a link inside your email.
1. Create the Campaign
- From Email Campaigns, click Create Campaign, give it a name, keep Campaign Type as Standard, and click Create Campaign.
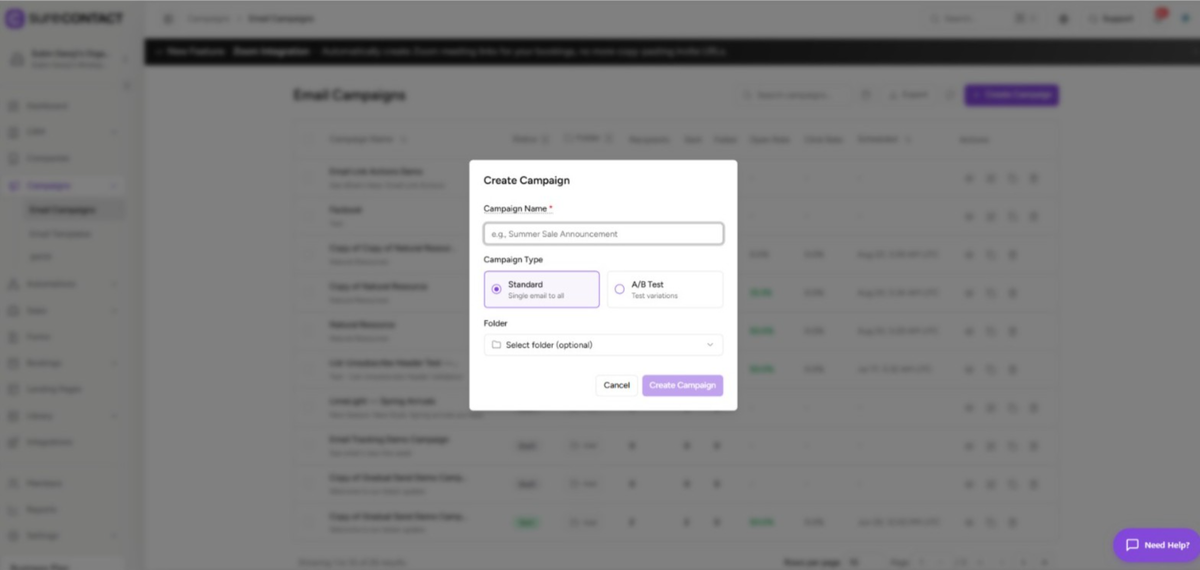
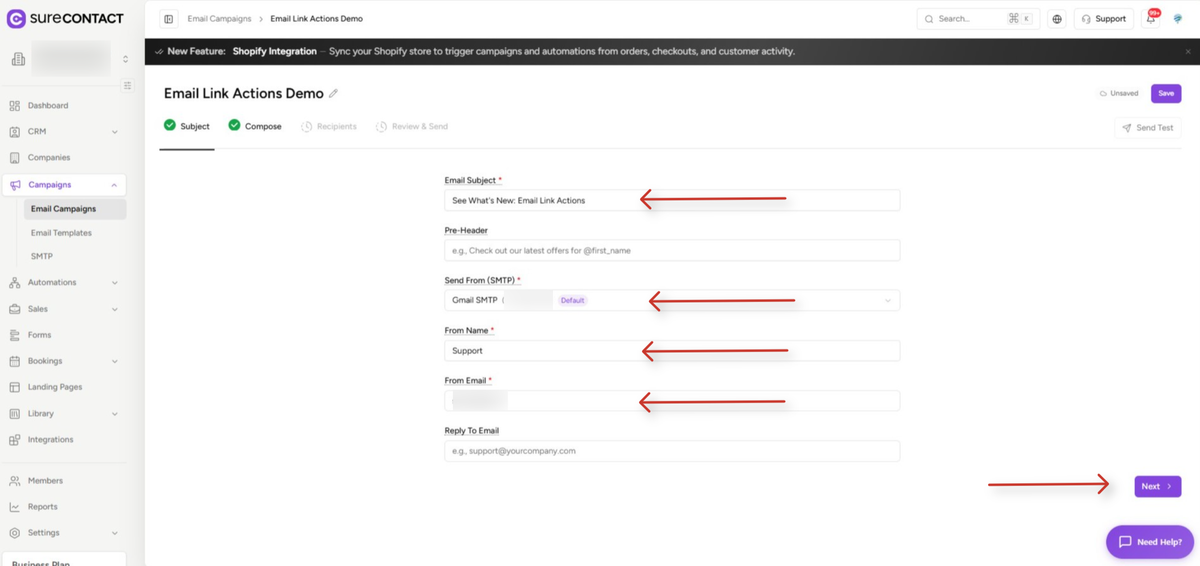
2. Fill in the Subject Step
- Add the Email Subject, and confirm the Send From (SMTP), From Name and From Email fields, then click Next.
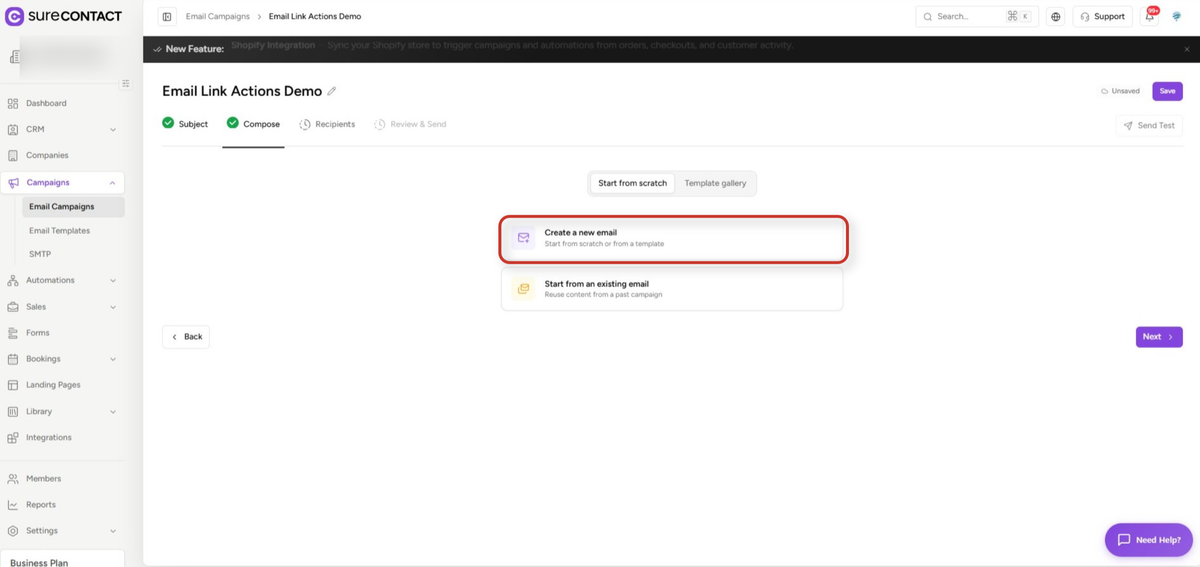
3. Choose “Create a New Email” on the Compose Step
- On the Compose step, select Create a new email to start from scratch or from a template.
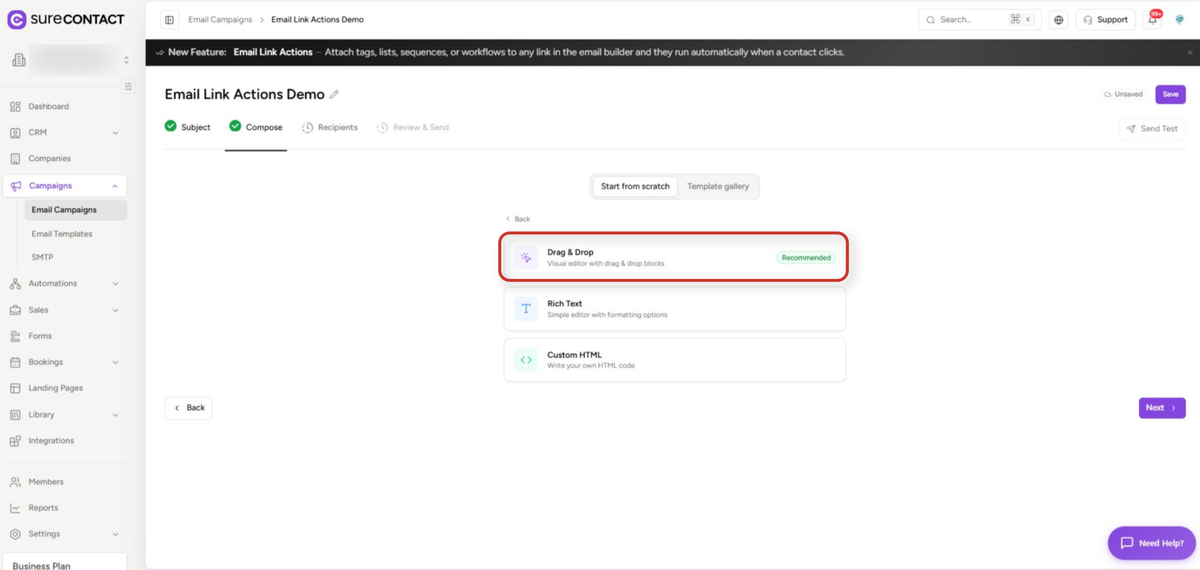
4. Select the Drag & Drop Editor
- Choose Drag & Drop. Link Actions are only available in the visual, drag-and-drop editor, not in Rich Text or Custom HTML.
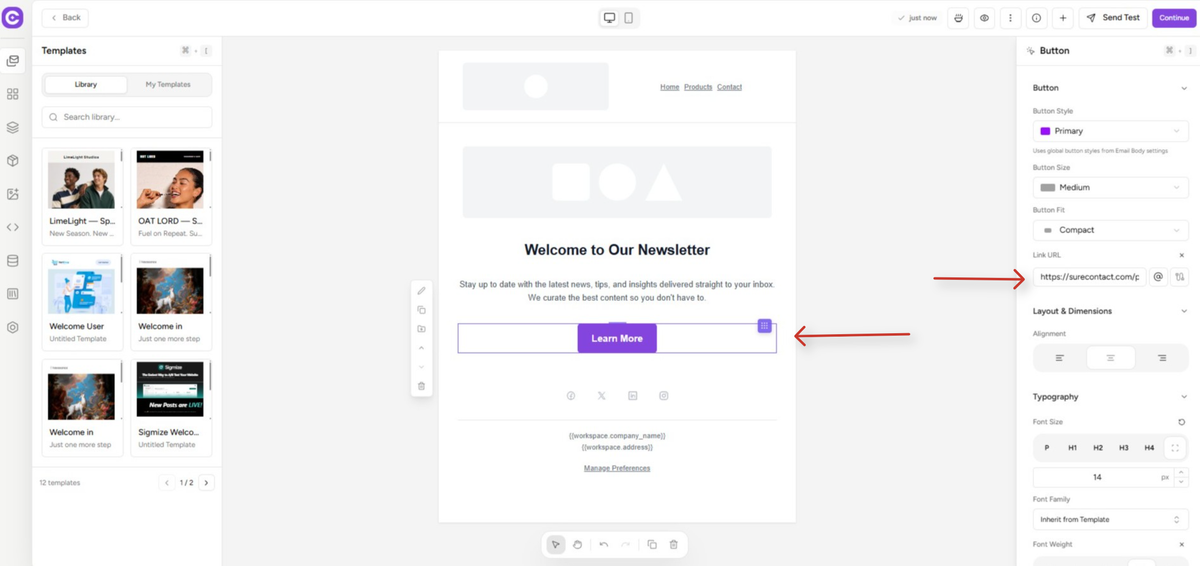
5. Select a Button or Link, and Set its Link URL
- Click any button or text link in the email canvas to open its settings panel on the right, then enter the destination in Link URL.
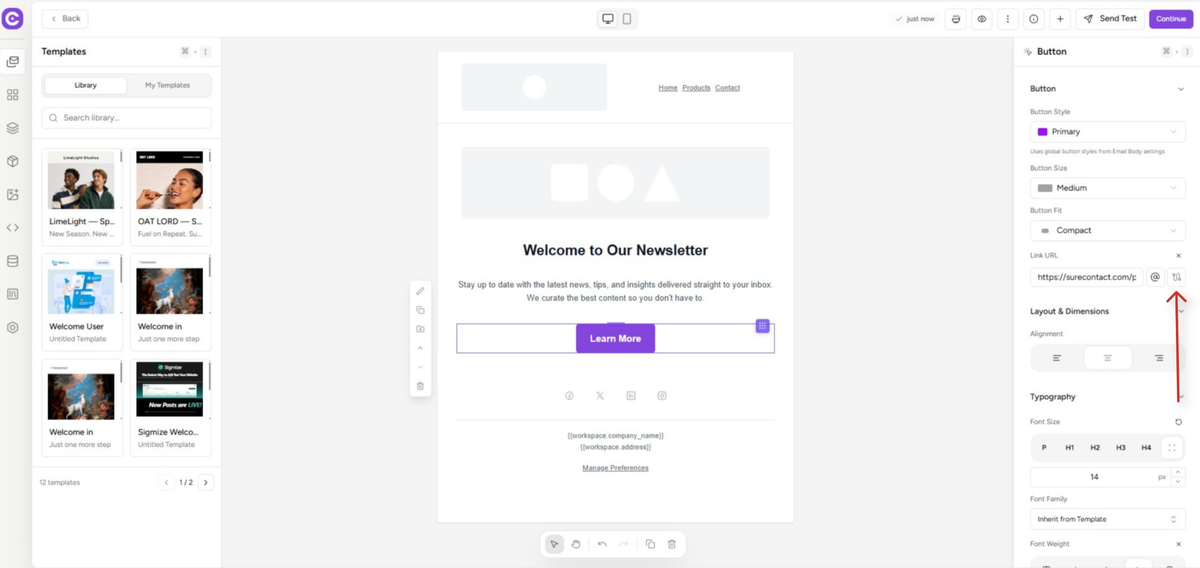
6. Open Link Actions and Add an Action
- Click the Link Actions icon next to the Link URL field to open the Link Actions panel.
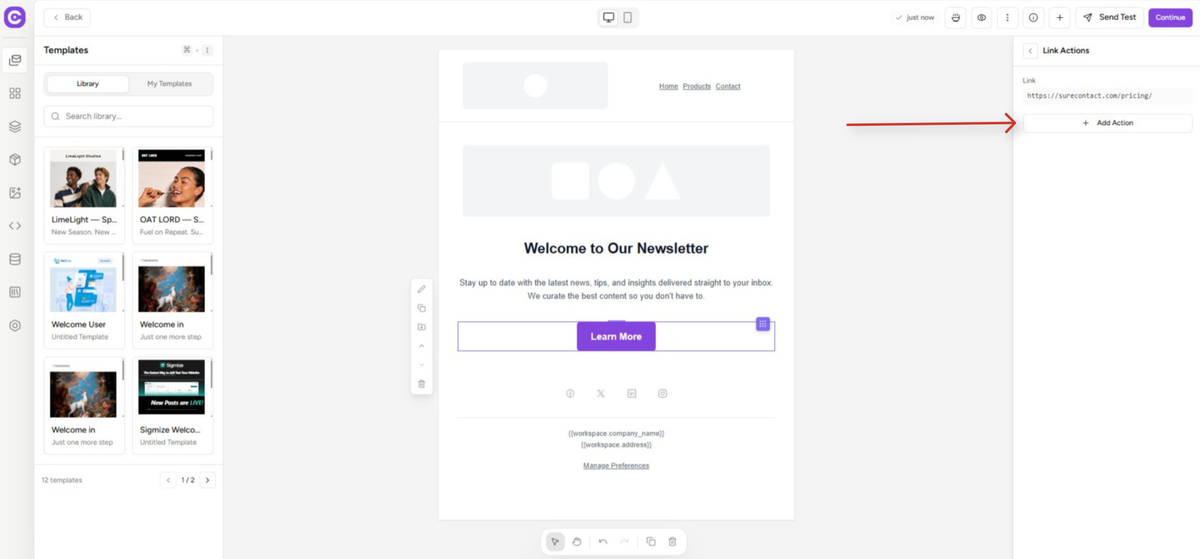
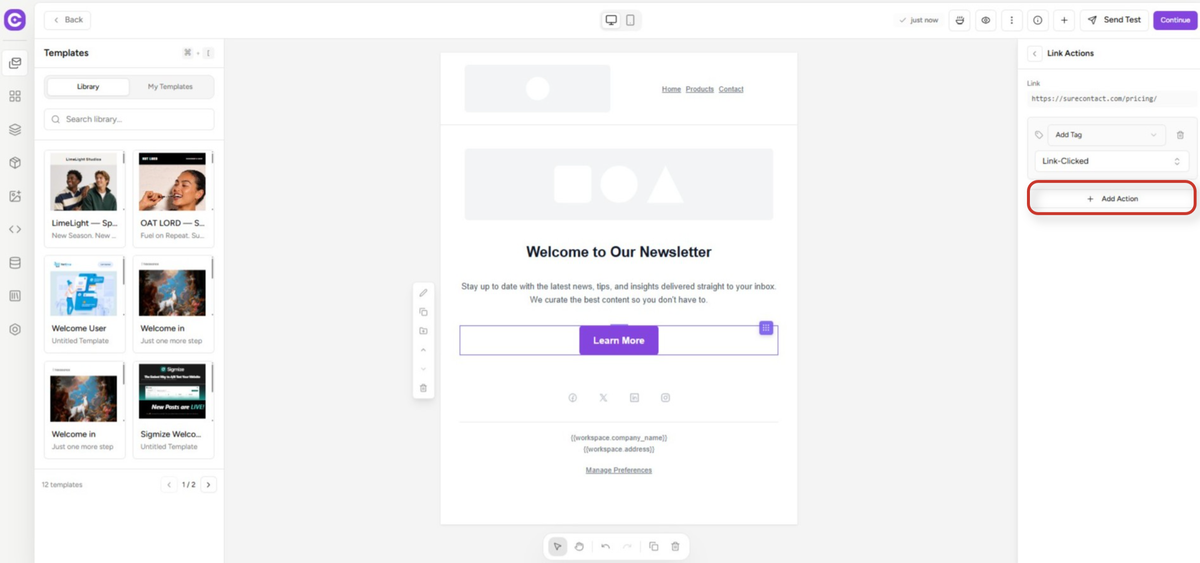
- Click Add Action, choose an action type such as Add Tag, and select or create the tag (for example, link-clicked).
- Click Add Action again to attach more than one action to the same link if needed.
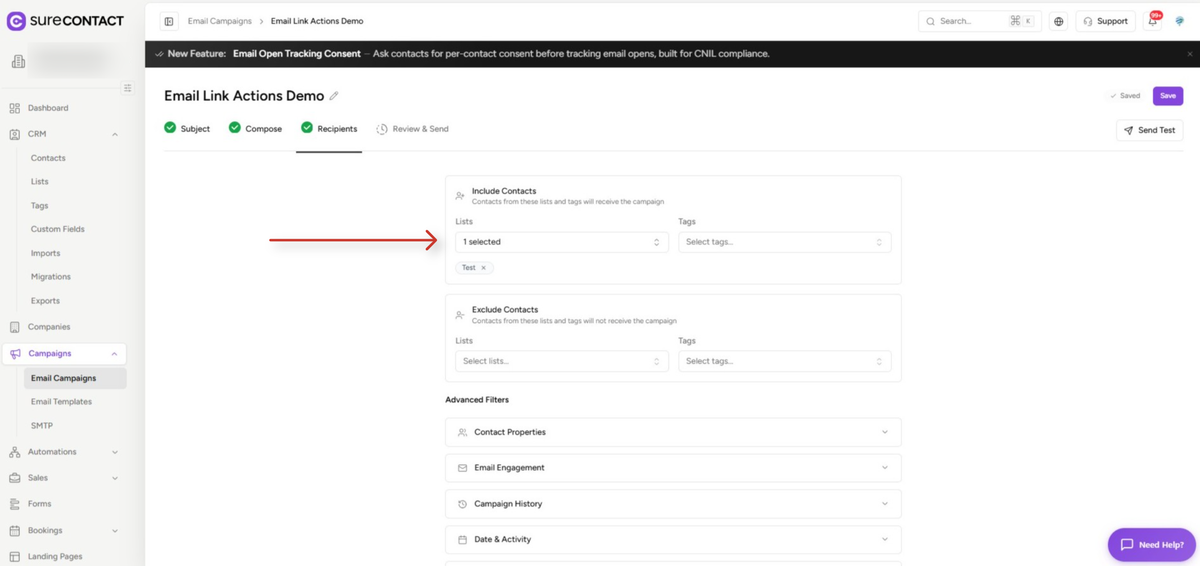
7. Choose Recipients
- On the Recipients step, add the lists and/or tags whose contacts should receive the campaign under Include Contacts.
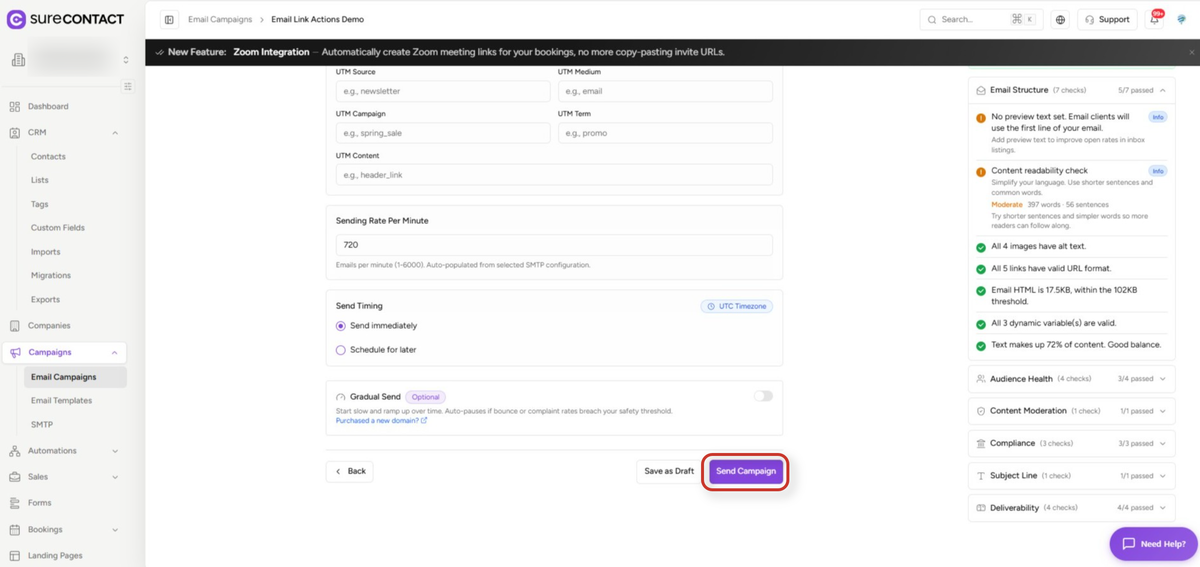
8. Review and Send
- On the Review & Send step, check the Pre-Send Analysis panel for warnings, then click Continue Anyway (or resolve the warnings first) and send the campaign.
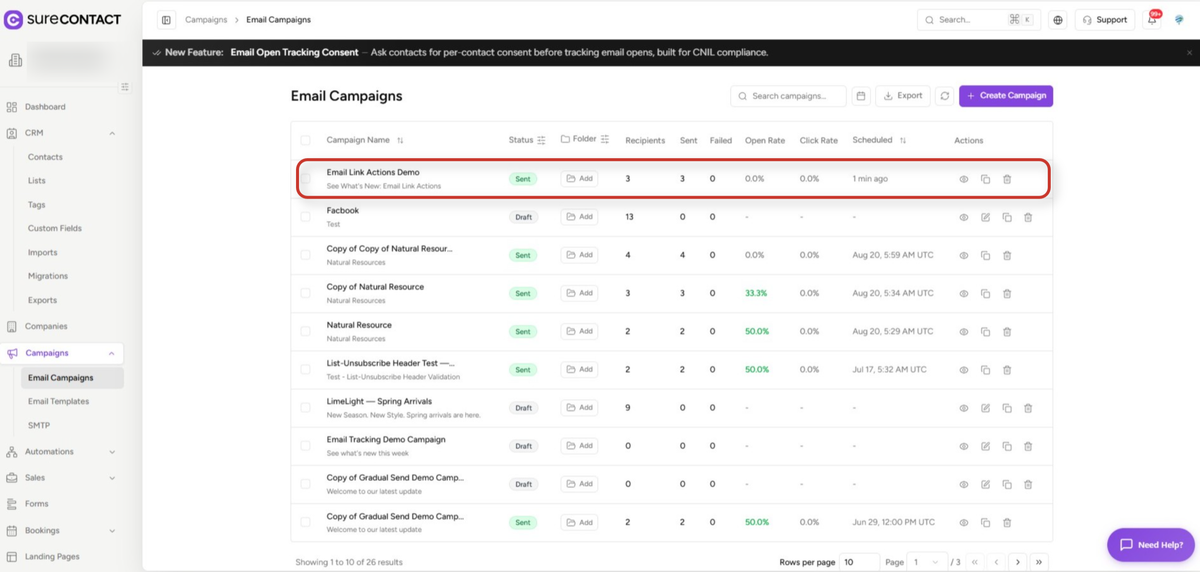
9. Confirm the Campaign Was Sent
- Back on the Email Campaigns list, the campaign shows a Sent status along with live Open Rate and Click Rate once contacts interact with it.
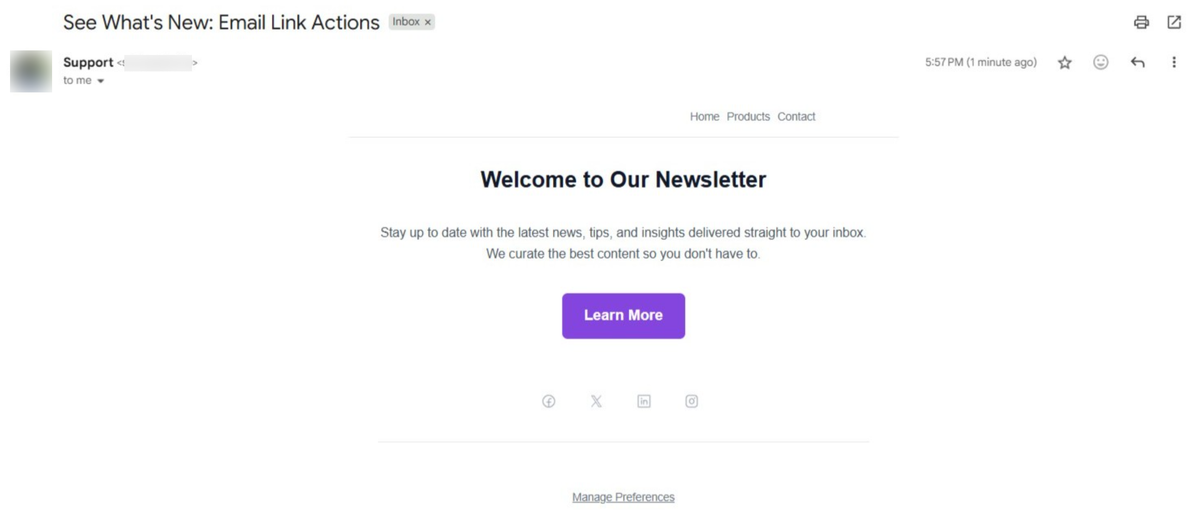
10. Contact Clicks the Link
- When a recipient opens the email and clicks the button or link, SureContact fires the configured Link Action in the background, no further action is needed from the contact.
Confirming a Link Action Ran
Every Link Action execution is logged like any other automation, so you can verify it fired correctly.
11. Open Automations → History
- Go to Automations → History to see the Execution History. Each link click appears as its own row, named Campaign [Campaign Name]: Link Clicked – [URL], with a Completed status.
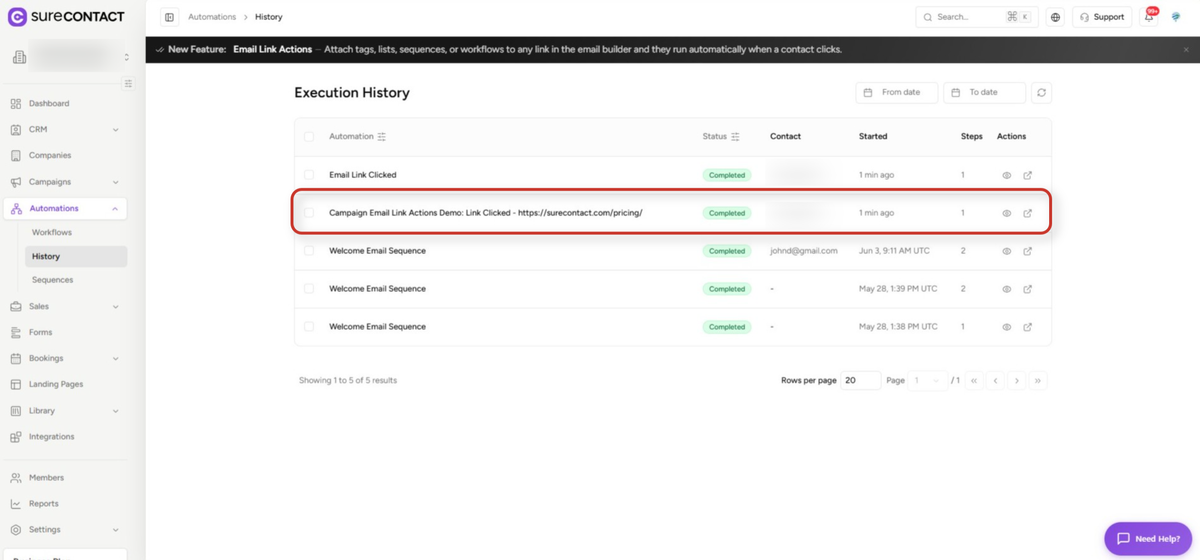
12. Open the Execution Detail
- Click a row to see its Execution Timeline. Expand the Add Tag (or other action) step to see its Status, Added At timestamp, and the exact tag name and count that were applied.
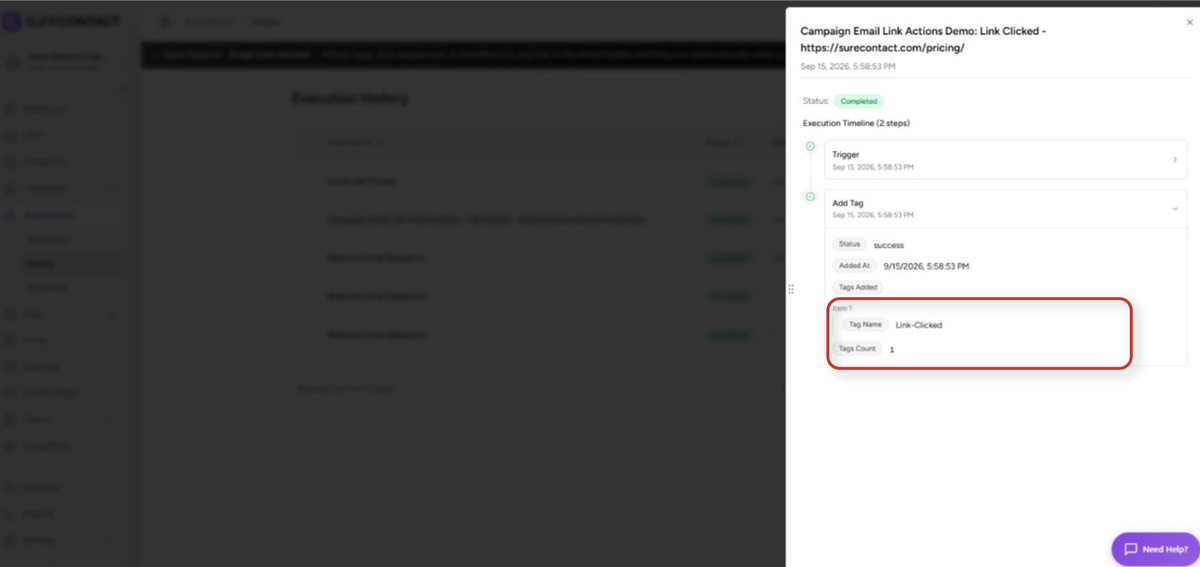
That’s it! The setup is done.
Need Help?
If you need any assistance, please email [email protected], and our support team will be happy to help you.
We don't respond to the article feedback, we use it to improve our support content.