
- Introduction to SureContact Dashboard
- How to Install and Connect the SureContact WordPress Plugin
- What Do Contact Fields Mean in the SureContact WordPress Plugin
- How to Invite Members to a Workspace in SureContact
- How to Switch Organizations in SureContact
- Workspace-Level Contact Allocation in SureContact
- Workspace-Level Timezone Settings in SureContact
- How to Add a Custom Tracking Domain in a Workspace in SureContact
- SureContact MCP Server
- Creating Forms in SureContact
- Create Forms & assign lists & tags
- Multi Language Support(WordPress)
- Page Visit Tracking Guide (WordPress)
- Forms Custom Fields Sync Guide
- Landing Pages User Flow Guide
- SureContact Organization Workspace Setup Guide
- Companies User Flow Guide
- FAQs
- Bulk Operations SureContact
- SureContact Double Opt-In Guide
- SureContact API Keys Guide
- SureContact 2FA User Guide
- SureContact Bookings User Flow Guide
- SureContact MultiStep Forms Guide
- Zoom Integration with SureContact
- Group Booking User Flow Documentation
- Global Search – User Flow Documentation
- Folders in SureContact
- SureContact Email Tracking Pixel Regulations
- Email Open Tracking Consent SureContact
- Forms Custom Success Message Redirect Guide
- Partial Form Submission Guide
- Shopify Integration with SureContact Guide
- Migrate to Unified Preference Page
- Configuring Profile Fields in SureContact
- Setup SMTP in SureContact
- Email Campaigns in SureContact
- How to Add a Preferences URL in Your Emails
- How to Share Email Templates in SureContact
- Spintax Feature in SureContact
- Deleting Sent Campaigns in SureContact
- A/B Testing Integration Guide
- Unsubscription Guide
- SureContact SMTP Setup Guide
- SMTP Routing User Flow
- FluentCRM Integration with SureContact
- SureContact Third-Party Integration — Step-by-Step Guide
- Fluent Forms Integration with SureContact
- SureForms Integration with SureContact
- WPForms Integration with SureContact
- Bulk Sync WordPress Users to SureContact
- Contact Form 7 Integration with SureContact
- Sync WooCommerce Customers with SureContact
- FluentCart & FluentCommunity Integration With SureContact
Configuring Profile Fields in SureContact
Every contact in SureContact comes with a set of built-in fields such as First Name, Phone, Company, and Birthdate. Not every business uses all of them. A B2C store may never need Job Title, and a B2B team may not care about Anniversary.
The Profile Fields setting lets a workspace admin choose which of these fields appear on a contact’s profile and in what order. This guide explains where the setting lives, what it affects, and how to hide, show, and reorder fields step by step.
Prerequisites
Before configuring Profile Fields, please ensure the following:
1. You Have the Manage Settings Permission
Only users with the Manage Settings permission can see and change Profile Fields. Other users won’t see the menu item, and opening the page directly sends them back to Settings.
Key Details
Where It Applies
- The Info tab on the contact detail page (under Contact Fields).
- The Add New Contact form.
Which Fields You Can Configure
- 13 standard fields can be hidden or reordered. In their default order: First Name, Last Name, Prefix, Suffix, Phone, Company, Job Title, Gender, Birthdate, Anniversary, Language, Timezone, and Source.
What You Can’t Change
- Email is always shown and always comes first, because a contact can’t exist without it.
- Custom fields aren’t part of this setting. You manage them separately under CRM → Custom Fields.
Hiding a Field Only Affects the Display
- Data already saved in a hidden field stays on the contact.
- The API, imports, exports, integrations, and automations still read and write hidden fields as usual.
- If you show the field again later, the existing values reappear.
Who It Affects
- The setting is workspace-wide, so every team member in the workspace sees the same layout.
New Fields
- If SureContact adds a new standard field in the future, it shows up automatically as visible and is placed after the fields you’ve arranged.
How to Configure Profile Fields
1. Open Settings
- Log in to your SureContact dashboard.
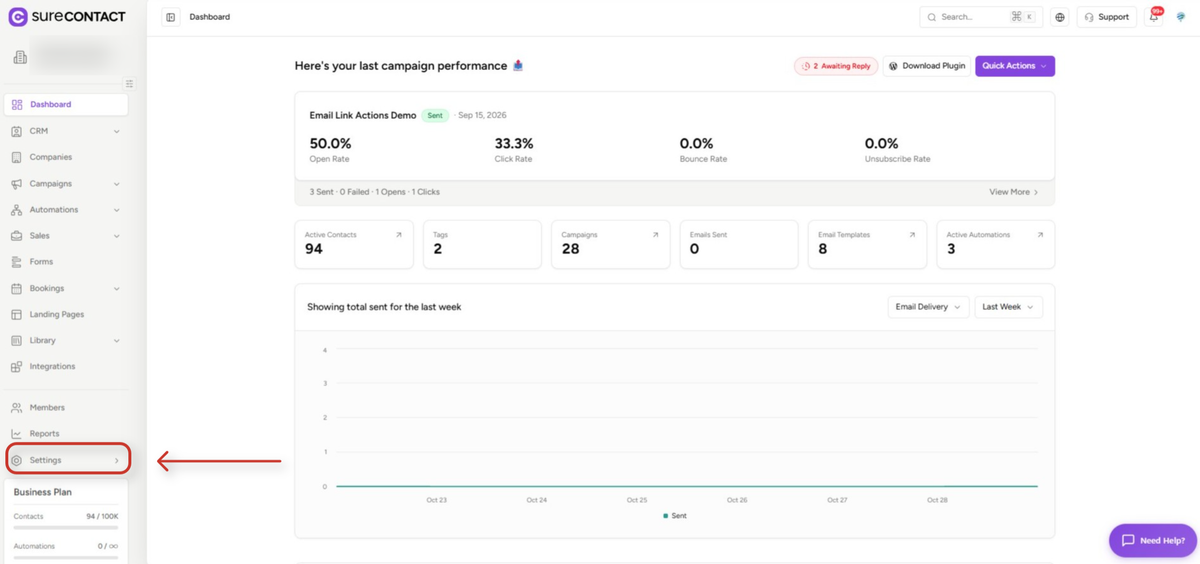
- Click Settings at the bottom of the left sidebar.
2. Open Profile Fields
- Under the Workspace group in the settings menu, click Profile Fields.
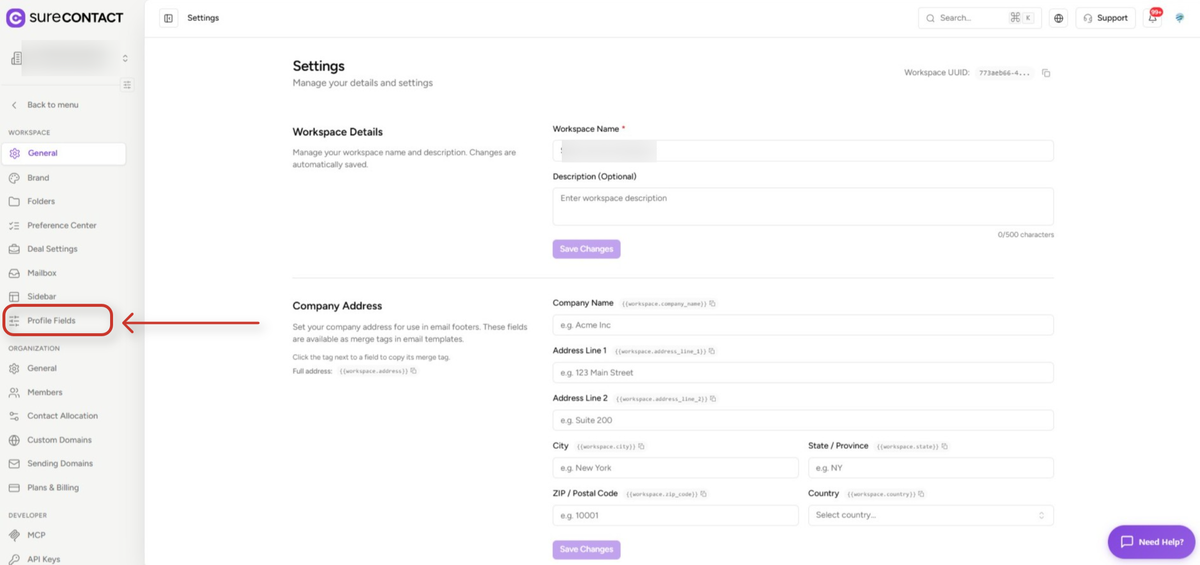
- The page reads: “Choose which standard fields appear on a profile, and in what order. Each profile’s identifier (email, company name, deal name) is always shown first.”
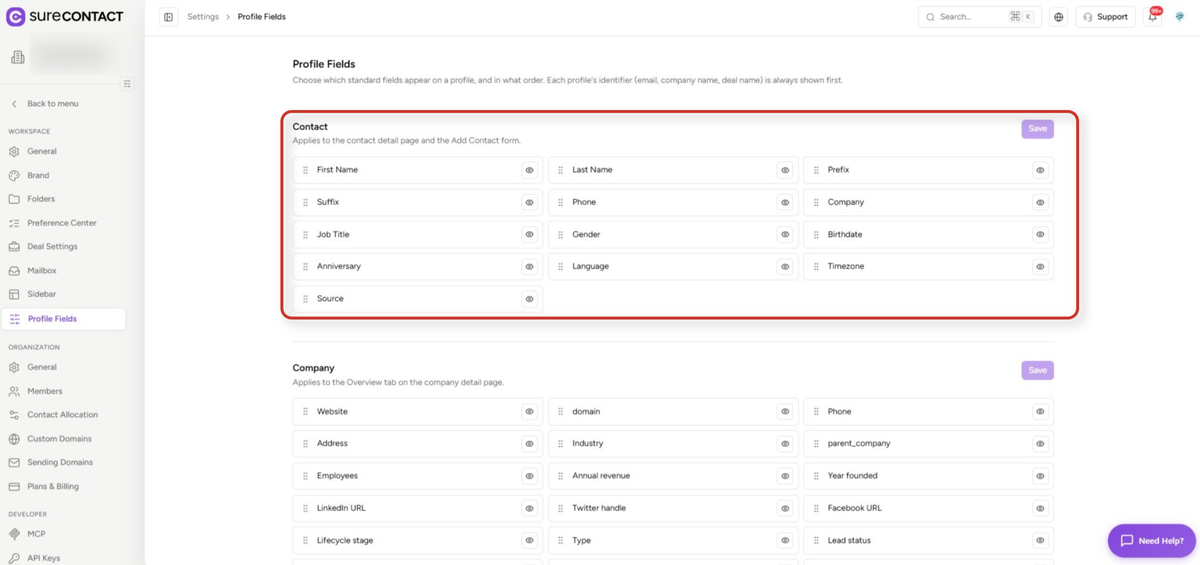
- The Contact section lists every configurable field as a card in a grid. Each card has a grip handle on the left and an eye icon on the right.
3. Hide or Show a Field
- In the Contact section, find the field you want to hide.
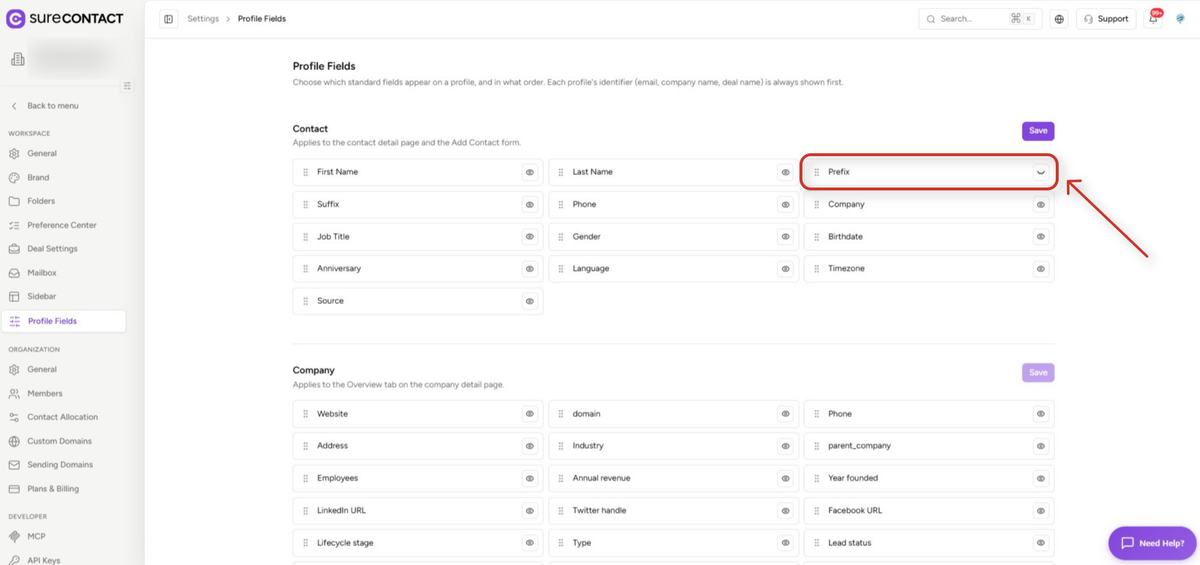
- Click the eye icon on the right side of that field.
- The field label turns faded and the icon changes to a closed eye. In the example below, Prefix has been hidden.
- To bring the field back, click the closed-eye icon again.
4. Reorder the Fields
- Hover over the grip handle (⋮⋮) on the left of a field.
- Drag the field to its new position and drop it. While you drag, the field’s original slot is shown faded.
- Keyboard users can focus the handle, press Space to pick the field up, move it with the arrow keys, and press Space again to drop it.
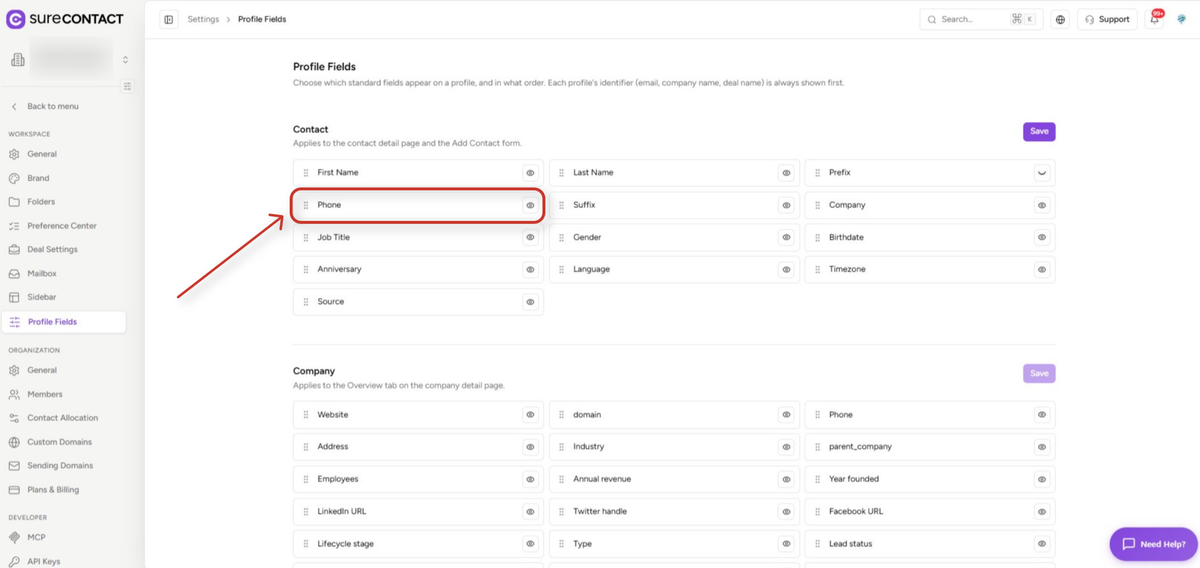
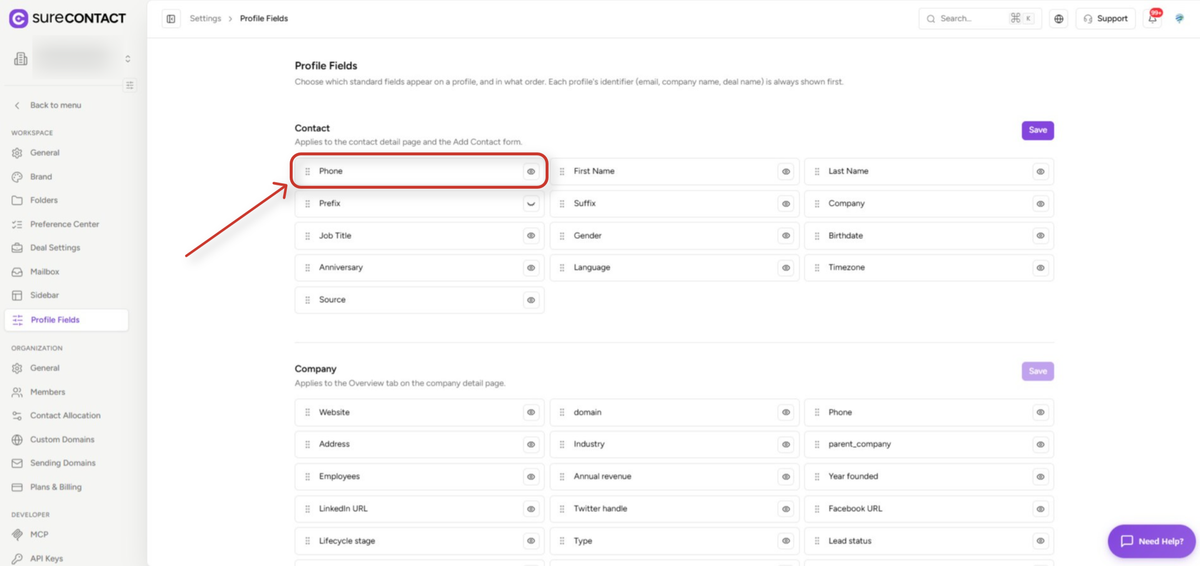
- In this example, Phone has been moved to the first position, ahead of First Name.
5. Save Your Changes
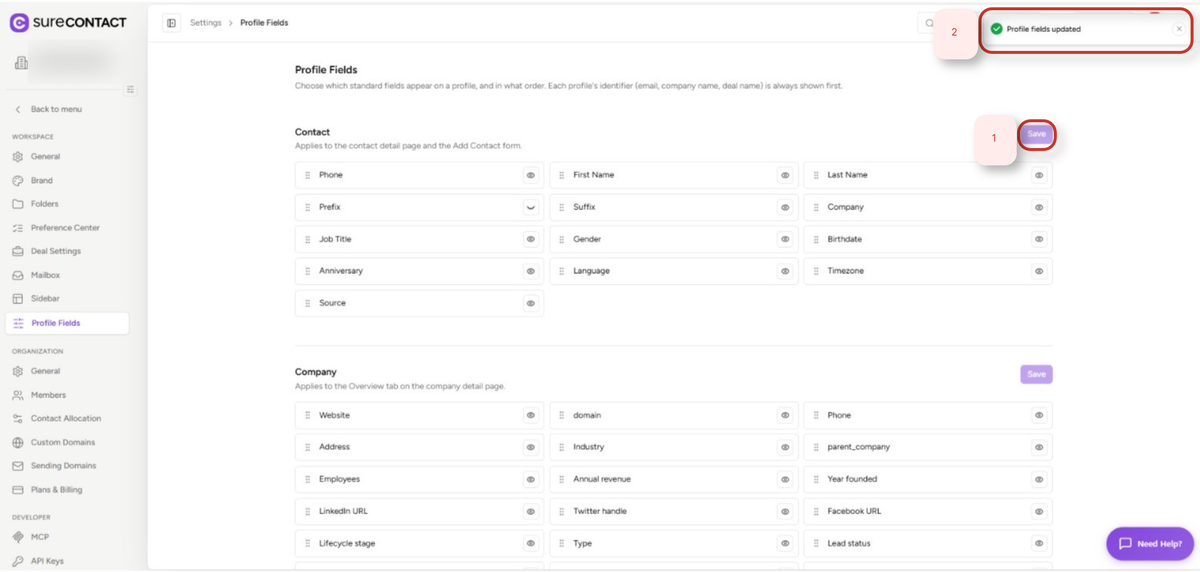
- Click the Save button at the top right of the Contact section (1).
- The button stays disabled until you make a change.
- A “Profile fields updated” message confirms the save (2).
- Each section (Contact, Company, Deal) has its own Save button, so save each section you edit.
6. Check the Result
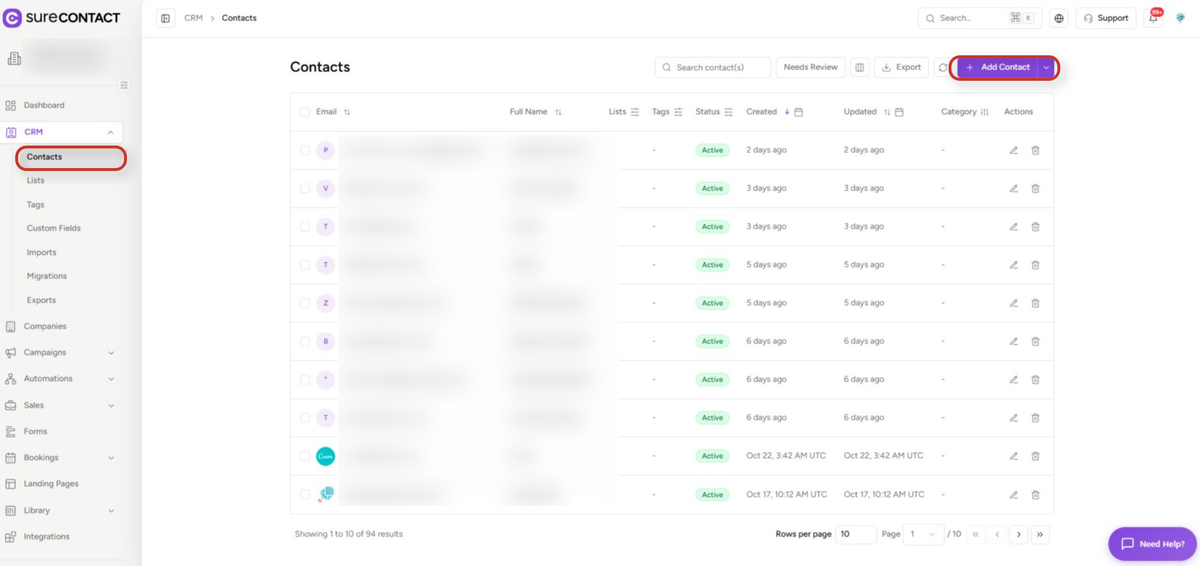
- Go to CRM → Contacts and open any contact.
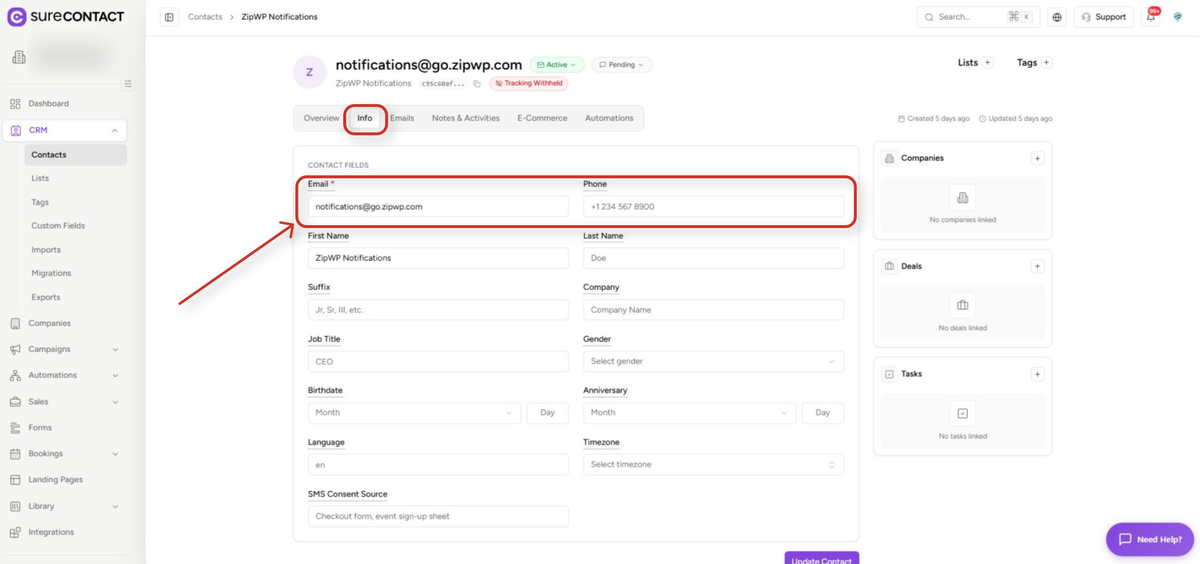
- Click the Info tab. Under Contact Fields, Email still comes first, followed by the fields in your new order. Hidden fields (Prefix, in this example) no longer appear.
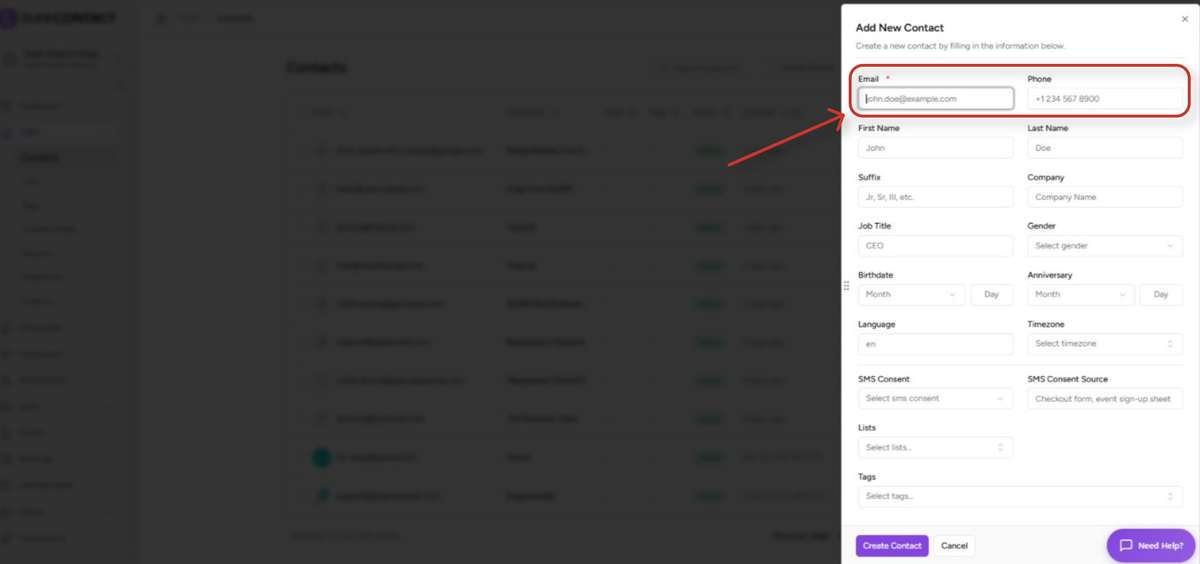
- Click Add Contact on the Contacts page. The Add New Contact form follows the same layout.
7. Company and Deal Sections (Optional)
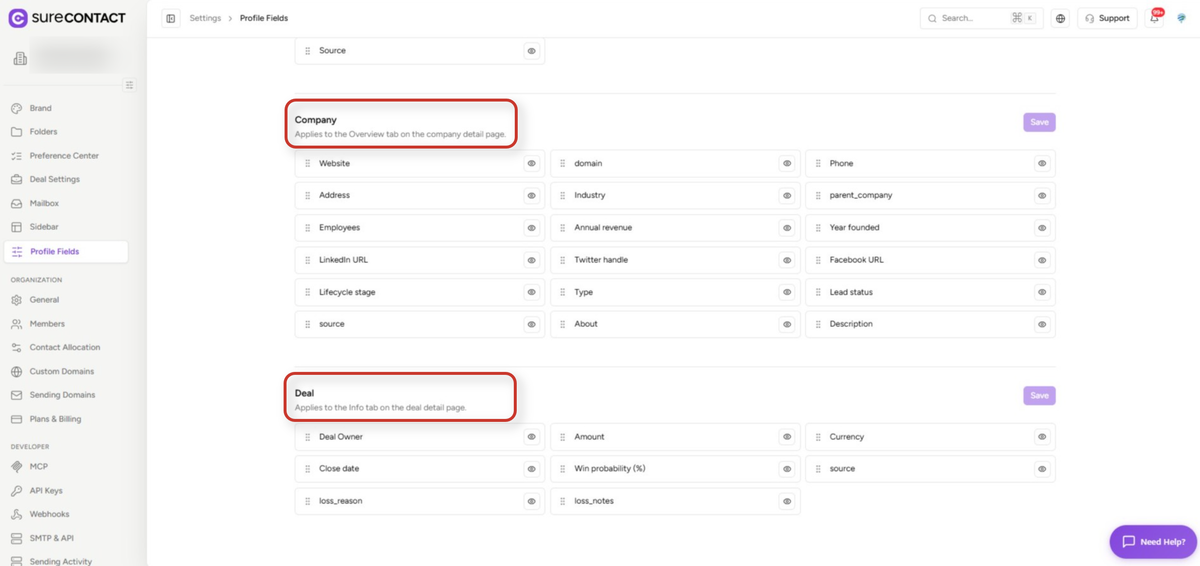
- Scroll down the Profile Fields page to find the Company and Deal sections, if your plan includes them.
- Company applies to the Overview tab on the company detail page. Deal applies to the Info tab on the deal detail page.
- Hide, show, and reorder these fields the same way, then click that section’s own Save button.
Frequently Asked Questions
Will hiding a field delete my contacts’ data?
No. It only hides the field in the dashboard. The data stays saved and keeps working in the API, imports, exports, and automations.
Why can’t I hide or move the Email field?
Email is the contact’s main identifier, so it always comes first and is always shown.
I don’t see Profile Fields in Settings. Why?
You need the Manage Settings permission. Ask your workspace owner or admin.
Can I set a different layout for each team member?
No. The layout is shared across the whole workspace.
Need Help?
If you need any assistance, please email [email protected], and our support team will be happy to help you.
We don't respond to the article feedback, we use it to improve our support content.